
Thanksgiving is the coziest holiday of the year, and your manicure should feel just as warm. While the turkey roasts and the pie cools, your nails are on display in every photo, every toast, and every hug. Moreover, a beautiful set of thanksgiving nails pulls your whole holiday look together — and because you carry them everywhere, they work harder than any single outfit piece.
In this guide, you will find more than 25 thanksgiving nail designs for every style and skill level, from five-minute solids in cranberry and oxblood to detailed golden-leaf art. You will also learn which fall colors flatter your skin tone, how to paint the most popular designs step by step, and how to keep your manicure chip-free through cooking, hosting, and celebrating.
Finally, whether you love rich harvest hues or subtle autumn accents, there is a design here for you. So grab your deepest reds and warmest oranges — it is time to get festive.
Why Thanksgiving Nails Deserve a Spot on Your Fall Calendar
There is something special about thanksgiving nails. Unlike everyday manicures, a Thanksgiving set is part of the celebration itself — it shows up in family photos, catches candlelight across the dinner table, and adds polish to every dish you carry. As a result, it might be the most visible part of your whole holiday outfit.
Thanksgiving nail art is also wonderfully versatile. In addition, deep, warm shades flatter every skin tone, and the season’s palette — cranberry, burnt orange, golden yellow, chocolate brown — pairs effortlessly with cozy sweaters and fall layers. For example, a simple oxblood manicure looks elegant at a formal dinner yet relaxed at a casual Friendsgiving.
Finally, fall is the perfect season to try richer, moodier colors. Similarly, after summer’s brights, deep shades feel fresh and sophisticated. Moreover, many Thanksgiving designs are beginner-friendly — leaves, dots, and plaid rely on simple shapes that look impressive with minimal skill.
25+ Cozy Thanksgiving Nail Designs
Below are the most-loved thanksgiving nail designs for 2026, organized by style, with difficulty notes for each. Short on time? For example, pick one statement design and keep the rest simple — a single accent nail often looks more polished than ten detailed ones.
Cranberry & Oxblood Thanksgiving Nails
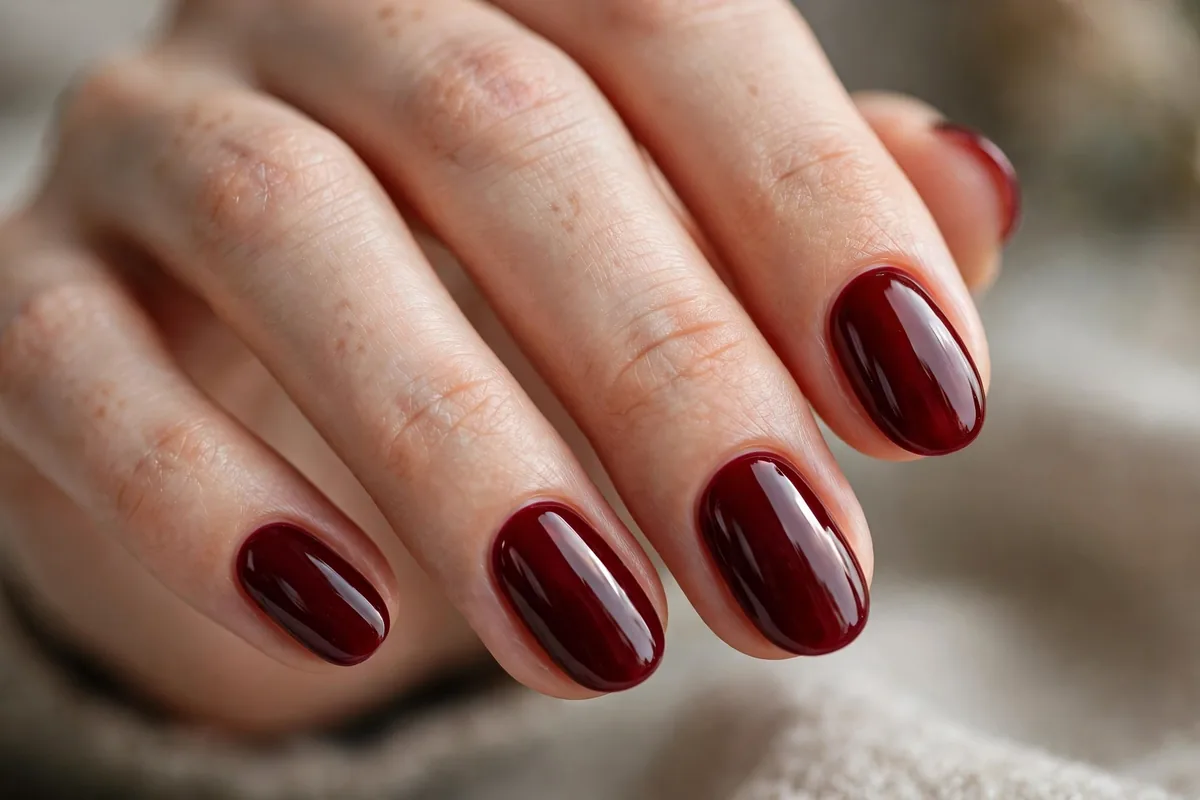
Deep berry reds are the undisputed stars of Thanksgiving. Cranberry — bright, juicy, festive — brings energy to the holiday table, while oxblood — dark, moody, almost black-cherry — adds drama and sophistication. Moreover, both shades flatter every skin tone and photograph beautifully in warm indoor light.
For maximum impact, wear them as a glossy solid with a patent-like shine: two thin coats, a glassy top coat, and immaculate cuticles. This is the easiest Thanksgiving look with the highest payoff. However, dark reds stain bare nails, so never skip base coat — a good base takes sixty seconds and prevents weeks of discoloration. If you loved October’s darker shades, our halloween nails guide has moody colors that transition beautifully into November.
Burnt Orange & Pumpkin Thanksgiving Nail Art
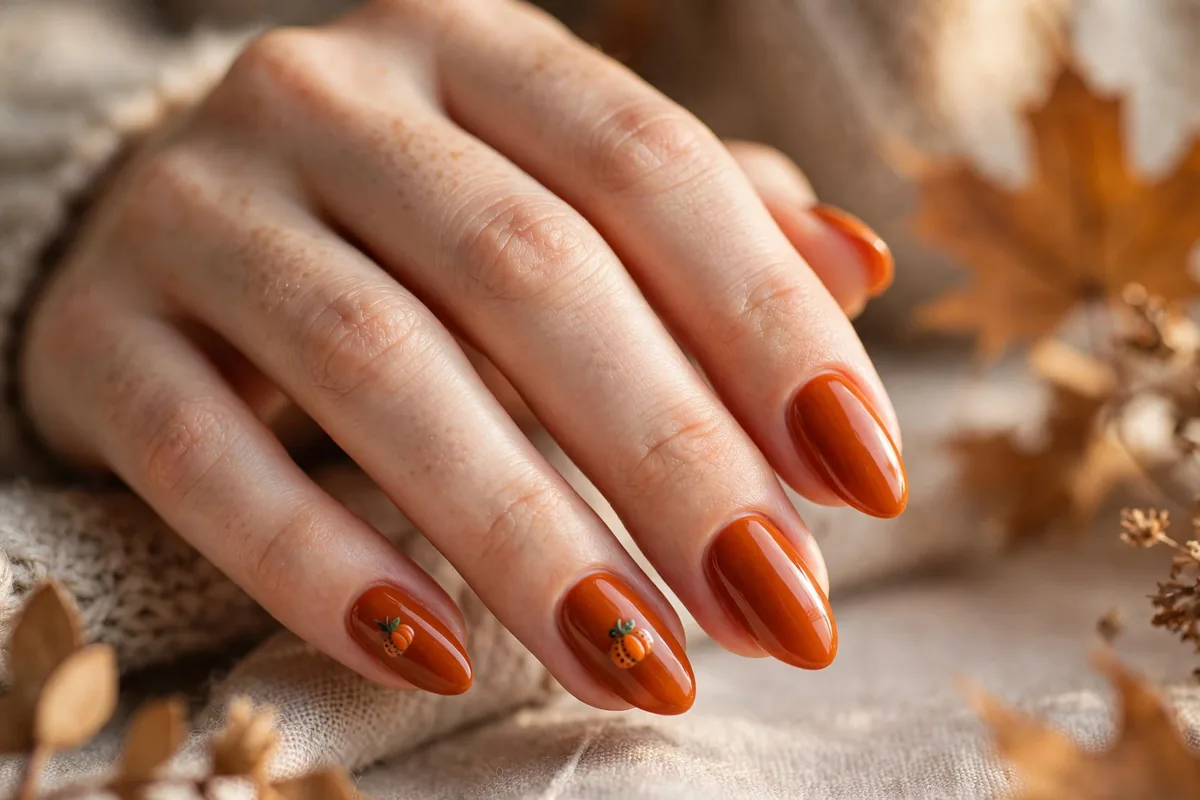
Nothing says fall like burnt orange. This warm, earthy shade captures autumn leaves and pumpkin pie and it glows against every skin tone. For example, wear it solid for a chic minimal look, or add tiny pumpkin accents for playful holiday spirit.
Pumpkin nail art is genuinely beginner-friendly. Paint the accent nail burnt orange, then add a slightly darker orange pumpkin shape — essentially a rounded triangle — with a thin green stem on top. Keep pumpkins small and centered; an oversized pumpkin reads cartoonish rather than cute. In addition, burnt orange pairs beautifully with gold glitter on neighboring nails for a harvest-party feel.
Golden Leaf Thanksgiving Nail Designs
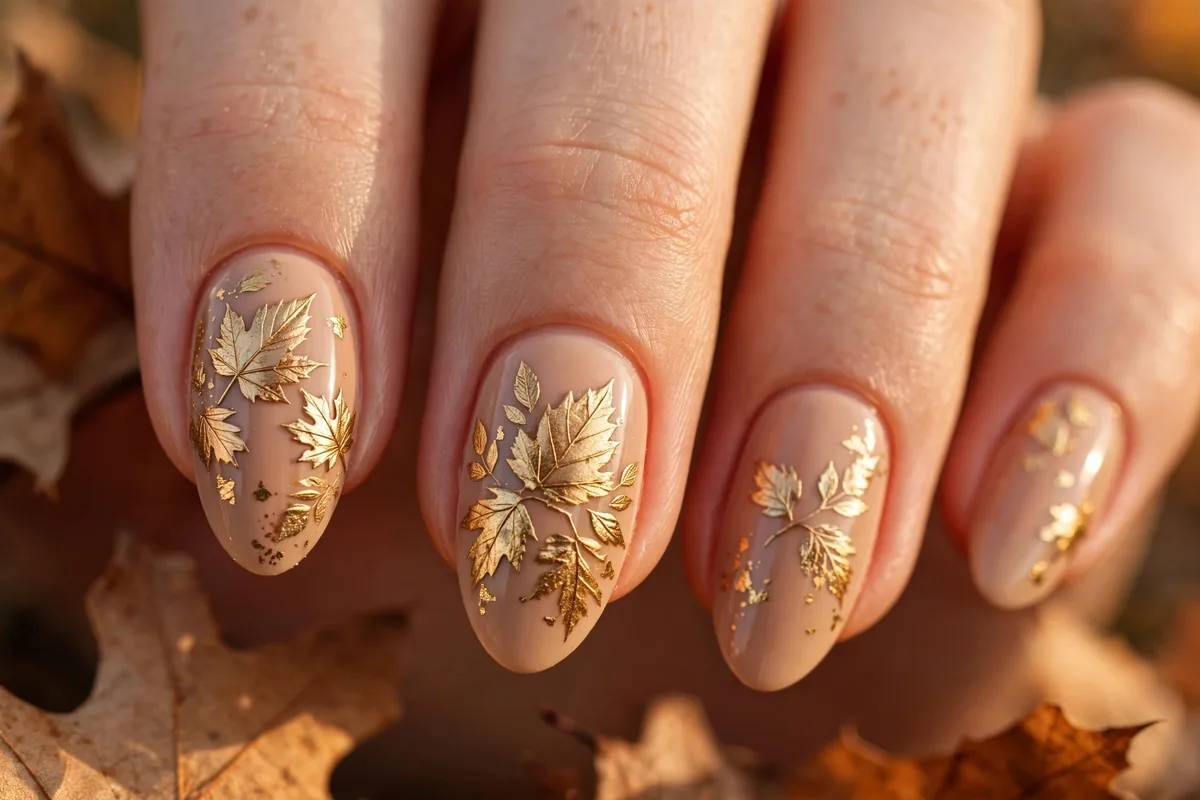
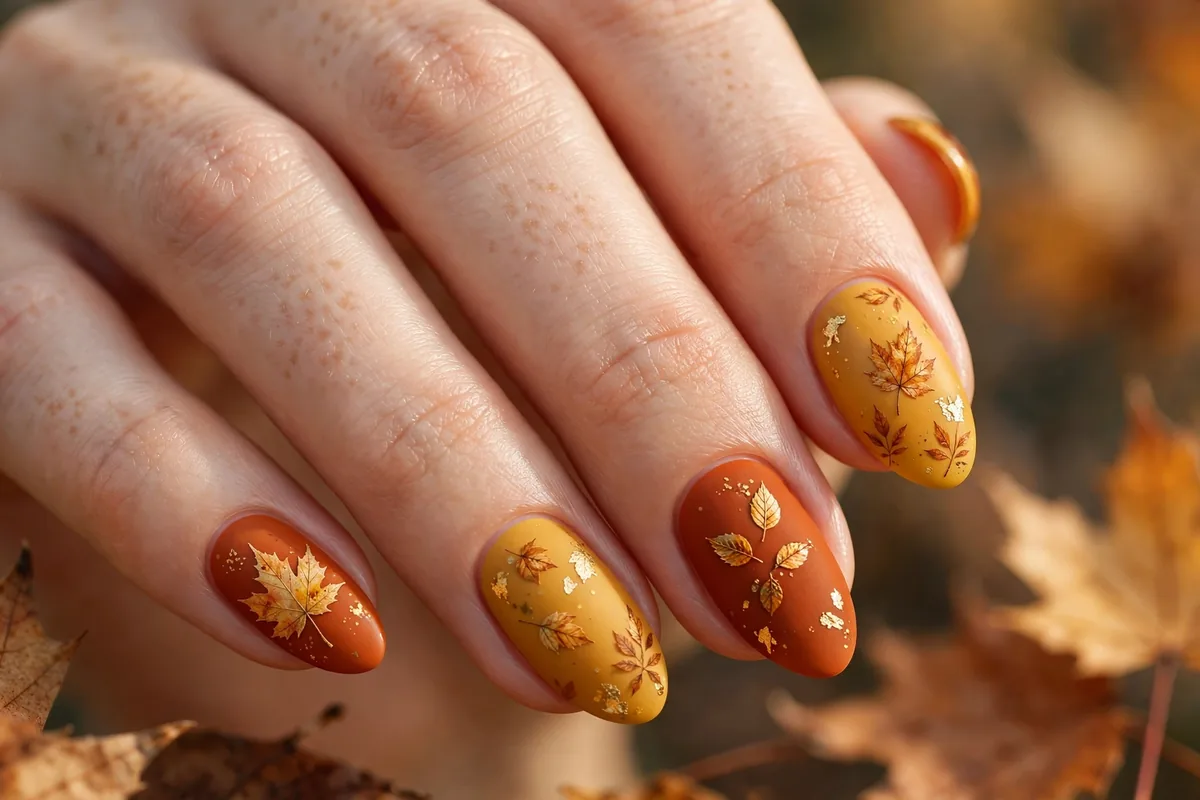
Golden leaves are autumn’s most elegant motif. Delicate leaf shapes in gold, copper, or bronze over a warm nude or deep burgundy base create a manicure that looks expensive and festive. This design suits every nail length, though longer almonds give leaves room to spread.
You have two approaches: hand-painting or stickers. Hand-painted leaves need only a detail brush — paint a central vein line, then add angled strokes on each side. Alternatively, gold leaf stickers deliver crisp, intricate results with zero painting skill; simply place them on dry polish and seal with two coats of top coat. As a result, even complete beginners can wear this luxurious look.
Plaid & Flannel Fall Nail Designs
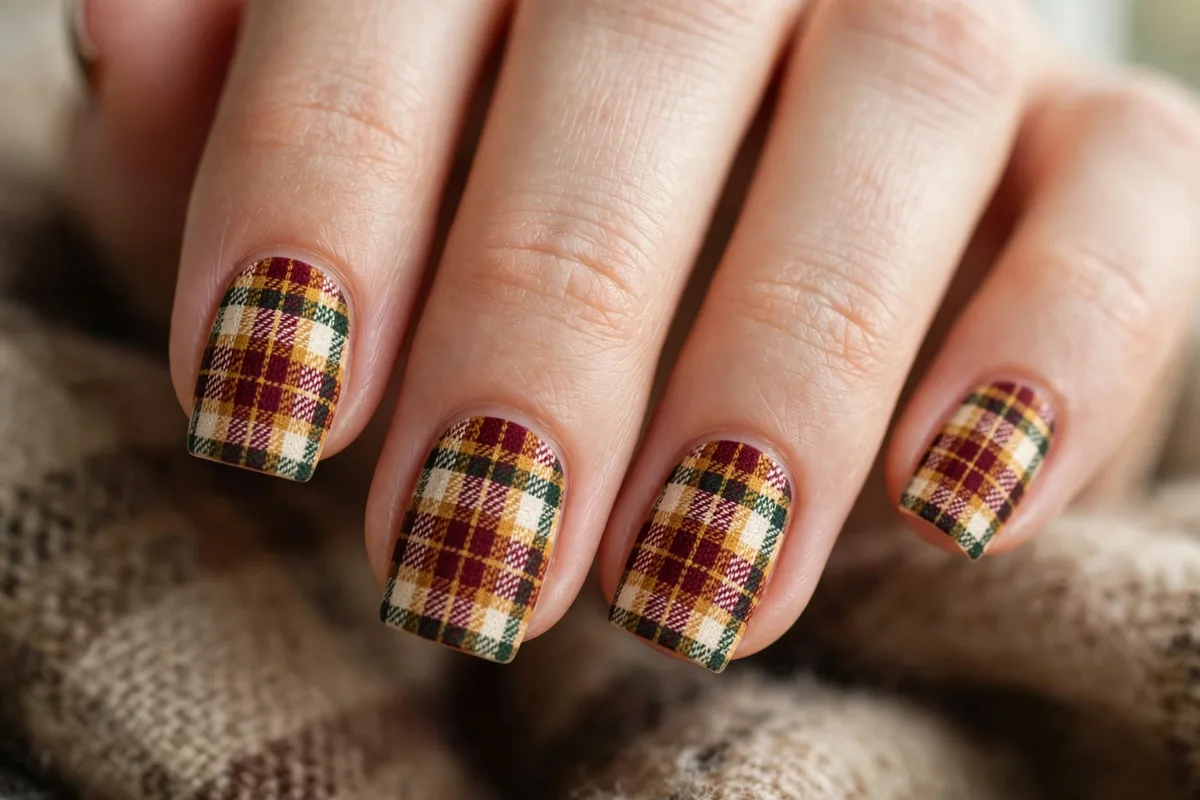
Plaid nails bring cozy flannel-shirt energy to your fingertips. Intersecting lines in burgundy, mustard, forest green, and cream mimic your favorite fall scarf — and the geometric pattern looks impressively detailed while being surprisingly simple to paint.
The technique relies on striping tape or a steady hand: paint a cream base, let it dry fully, then add vertical and horizontal stripes in alternating fall colors. Thin lines look refined; thicker bands feel bolder. Therefore, this design scales from subtle to statement depending on your line width. Finally, seal with glossy top coat to make the colors pop.
Velvet Matte Thanksgiving Nails
Matte top coat transforms rich fall shades into something velvety and sophisticated — like the difference between silk and velvet. Cranberry, chocolate, and forest green all gain depth under a matte finish, giving your manicure a cozy, tactile quality that suits the season perfectly.
Application is simple: paint your color as usual, then finish with matte top coat instead of glossy. Moreover, for extra dimension, mix finishes — matte cranberry with one glossy accent nail, or matte burgundy with glossy tips. However, matte shows oils and fingerprints more than gloss, so reapply matte top coat every few days and keep cuticle oil off the nail surface.
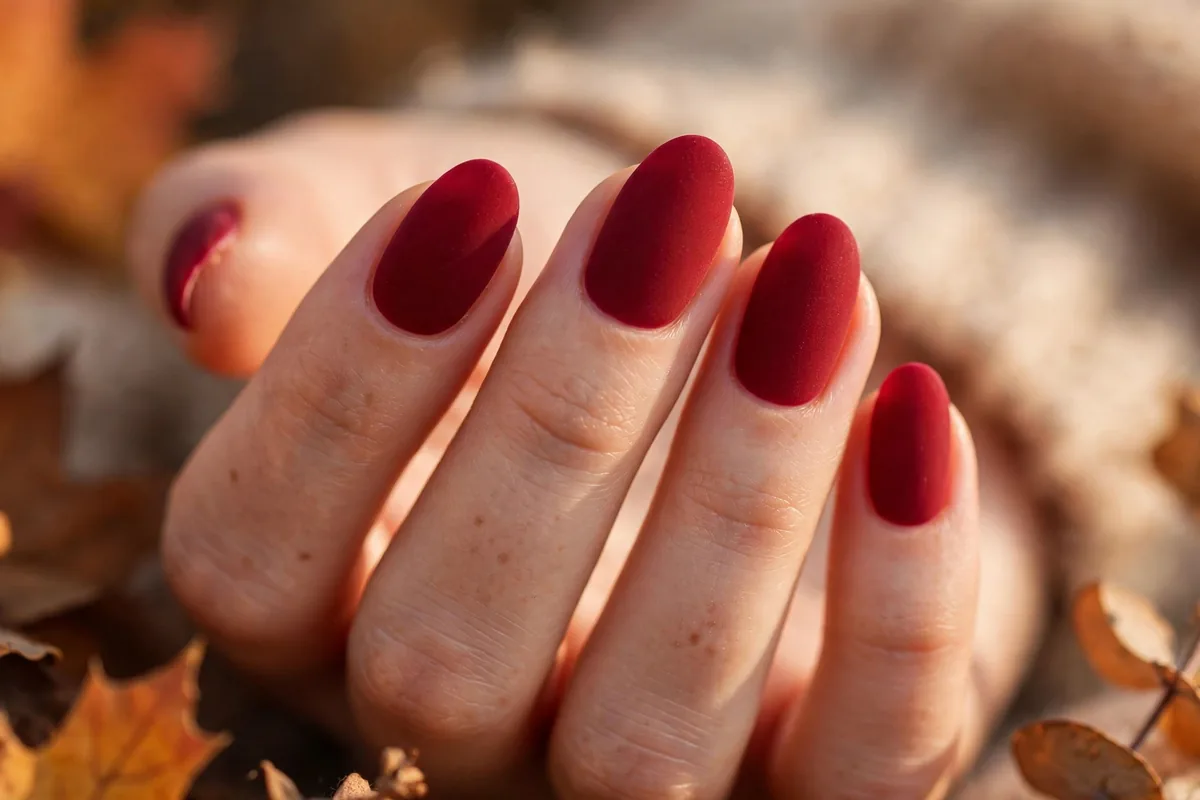
Cozy Sweater Thanksgiving Nail Art
Sweater-texture nails are the ultimate cozy manicure. Raised cable-knit patterns in cream, taupe, or soft gray mimic your favorite knit sweater — a 3D effect that feels wonderfully seasonal. This is like wrapping your hands around a warm mug.
The texture comes from 3D gel or thick polish applied with a detail brush: paint thin cable-knit lines over your base color, then let each layer dry fully. Without special products, you can fake the look by painting knit patterns in a slightly darker shade of your base color — the tonal contrast suggests texture beautifully. However, keep these nails at a practical length, since raised designs catch on things.
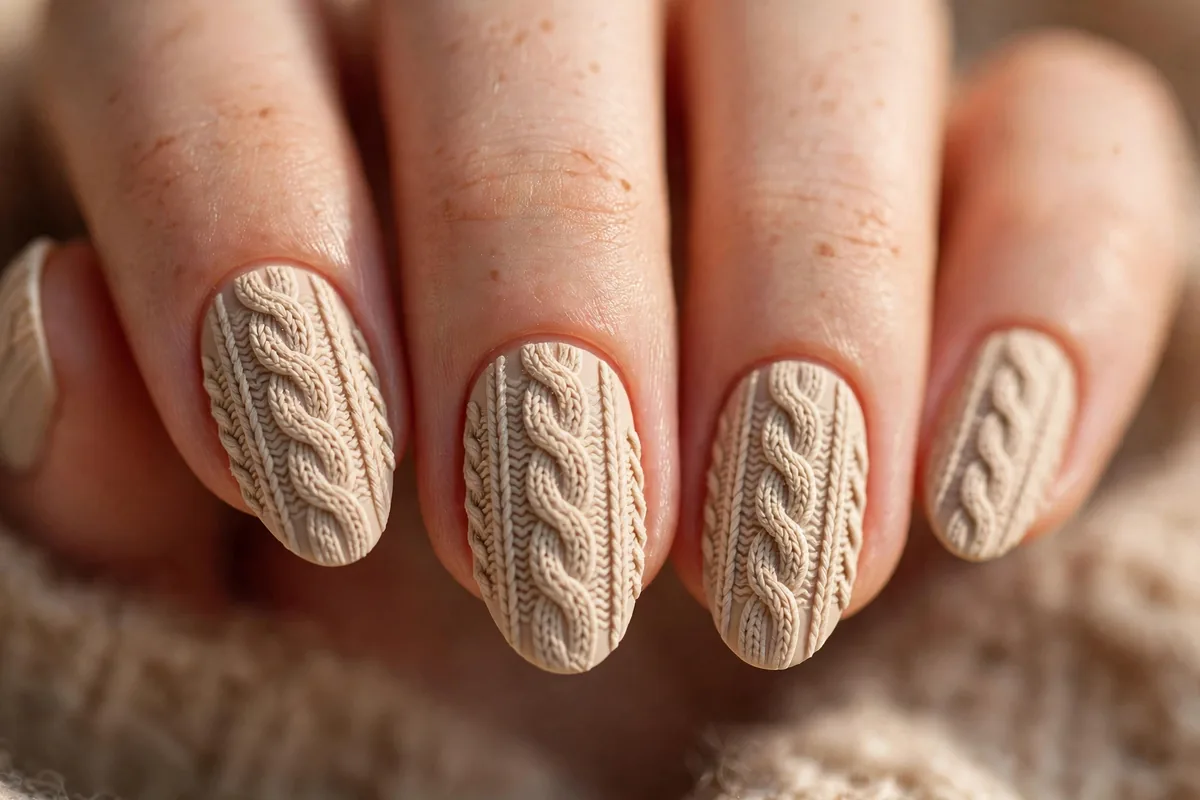
Gilded Chrome Thanksgiving Nails
A touch of gold elevates any fall manicure. Gilded chrome — gold powder buffed over gel for a liquid-metal finish — adds holiday luxury to deep burgundy, chocolate, or black bases. Moreover, it catches candlelight and photographs with stunning warmth.
True chrome needs gel and a lamp: apply no-wipe top coat, cure, buff gold chrome powder over the surface, and seal. For a simpler version, gold chrome-effect polish or gold foil flakes pressed into tacky polish deliver impressive shine without special equipment. However, use gold as an accent — full gold on all ten nails can overwhelm, while one or two gilded nails feel intentional and rich.
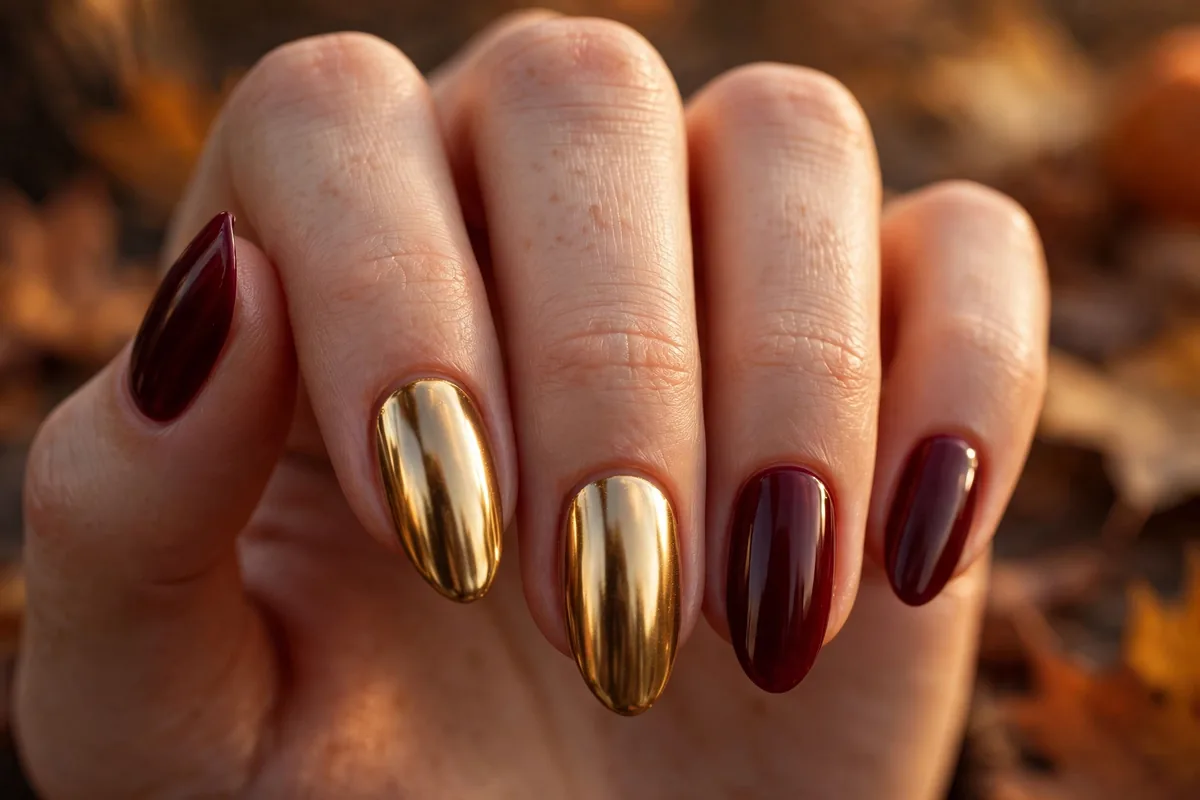
Thanksgiving French Tips
French tips get a harvest makeover when classic white is swapped for fall shades. For example, try copper tips over nude, burgundy tips over blush, or burnt orange tips over cream — each combination feels seasonal while staying elegant enough for any Thanksgiving gathering.
For crisp tips at home, use guides or a detail brush, then clean the smile line with acetone. Paint the tip in two thin strokes — one from each side toward the center — for better control than a single sweep. In addition, metallic tips in gold or copper add festive shimmer without extra effort.
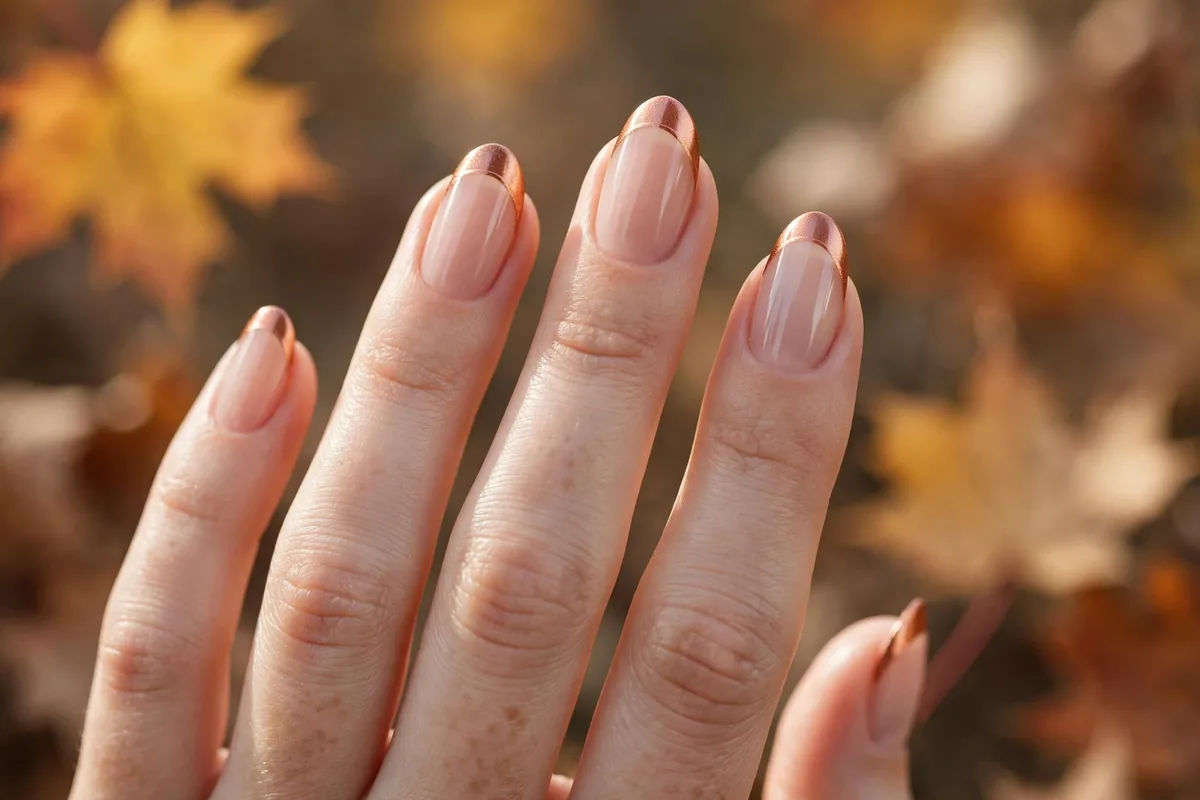
Glitter & Metallic Harvest Thanksgiving Nails
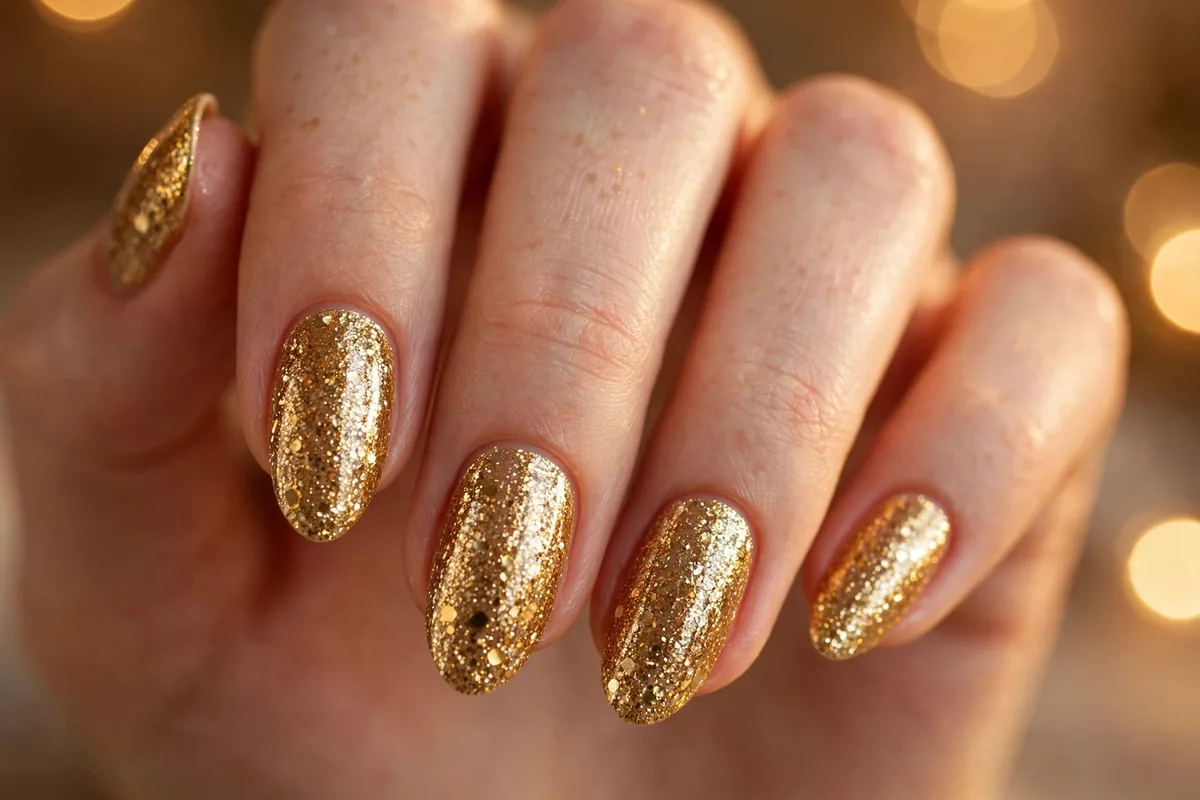
When in doubt, add sparkle. For example, gold glitter over cranberry, copper shimmer over chocolate, or a metallic gold accent nail brings festive energy to any Thanksgiving manicure. Glitter is also forgiving — it hides minor imperfections, making it ideal for beginners.
Moreover, for a refined take, try a glitter gradient: apply glitter polish heavily at the tip, fading toward the cuticle with a sponge. Alternatively, one fully glittered accent nail per hand keeps things balanced. Remove glitter with the foil method — acetone-soaked cotton wrapped in foil for ten minutes — so you enjoy the sparkle without dreading removal.
Easy DIY Thanksgiving Nails for Beginners
You do not need salon skills to create beautiful thanksgiving nails. In fact, many of the prettiest fall designs use only dots, leaves, and stickers — techniques any beginner can learn in an afternoon. The secret is forgiving designs: leaves are meant to look organic, plaid lines can wobble slightly, and pumpkins are charming when handmade.
First, start with one technique and build from there. For example, dots lead to pumpkin shapes, lines lead to plaid, and stickers handle everything else. Moreover, fall’s warm palette is forgiving — deep shades hide small mistakes far better than pale ones.
What You Will Need for DIY Thanksgiving Nails
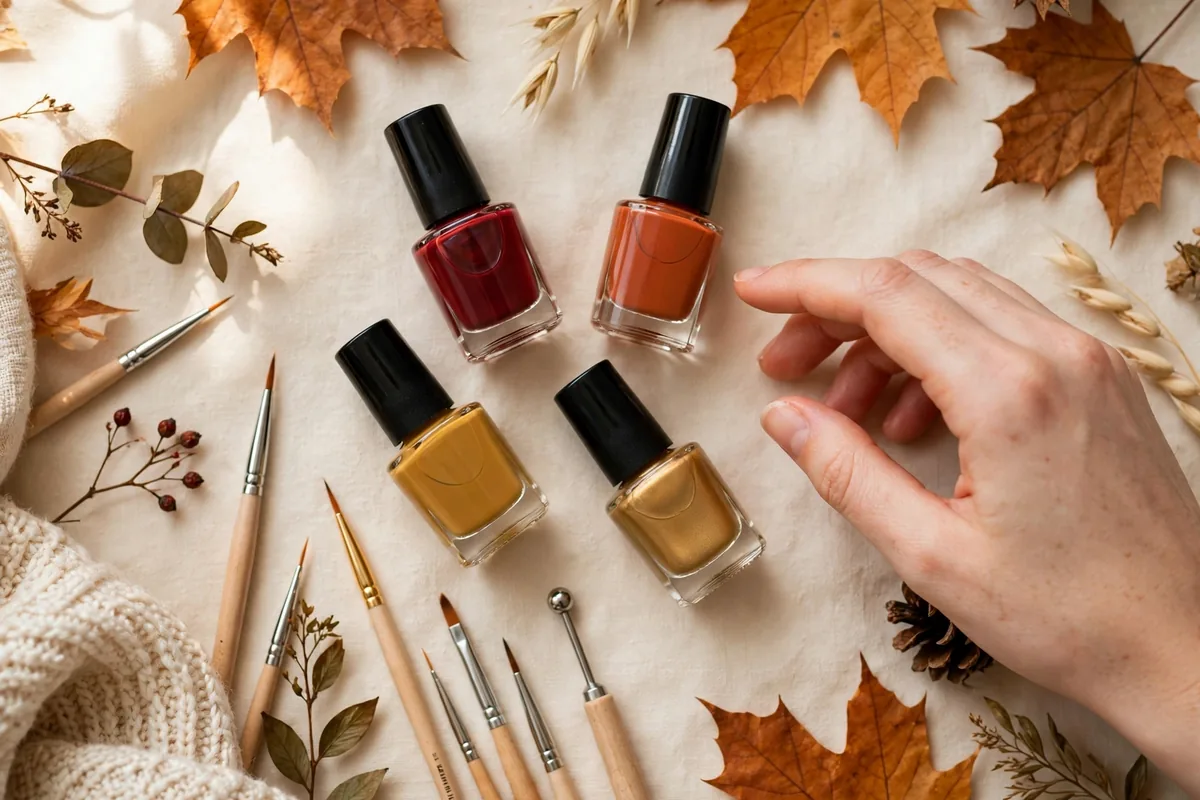
Before you start, gather a small kit: base coat, top coat (glossy and matte if possible), and fall colors — cranberry, burnt orange, mustard, chocolate, gold, and cream cover nearly every Thanksgiving design. A thin detail brush handles leaves and fine lines, while a dotting tool makes perfect dots. The rounded end of a bobby pin works as a substitute.
Fall-themed stickers are a beginner’s best friend: leaves, pumpkins, and plaid decals cost very little and look impressively neat. Simply place them on dry polish and seal with top coat. In addition, keep cotton pads and acetone nearby for quick cleanups — a small angled brush dipped in remover tidies edges beautifully.
Step-by-Step: Golden Leaf Thanksgiving Nail Art
This elegant design takes about twenty minutes. First, apply base coat and two coats of a warm nude or deep burgundy, letting each dry for two minutes. Next, dip a detail brush in metallic gold polish and paint a central vein line diagonally across the nail. Then add short angled strokes on each side of the vein to form a leaf shape.
Next, place one or two leaves per nail, varying their angles for a natural look. Finally, seal with glossy top coat once everything is completely dry — the shine makes the gold glow. If freehand leaves feel risky, gold leaf stickers give the same effect with zero painting.
Step-by-Step: Pumpkin Spice Accent Nail Art
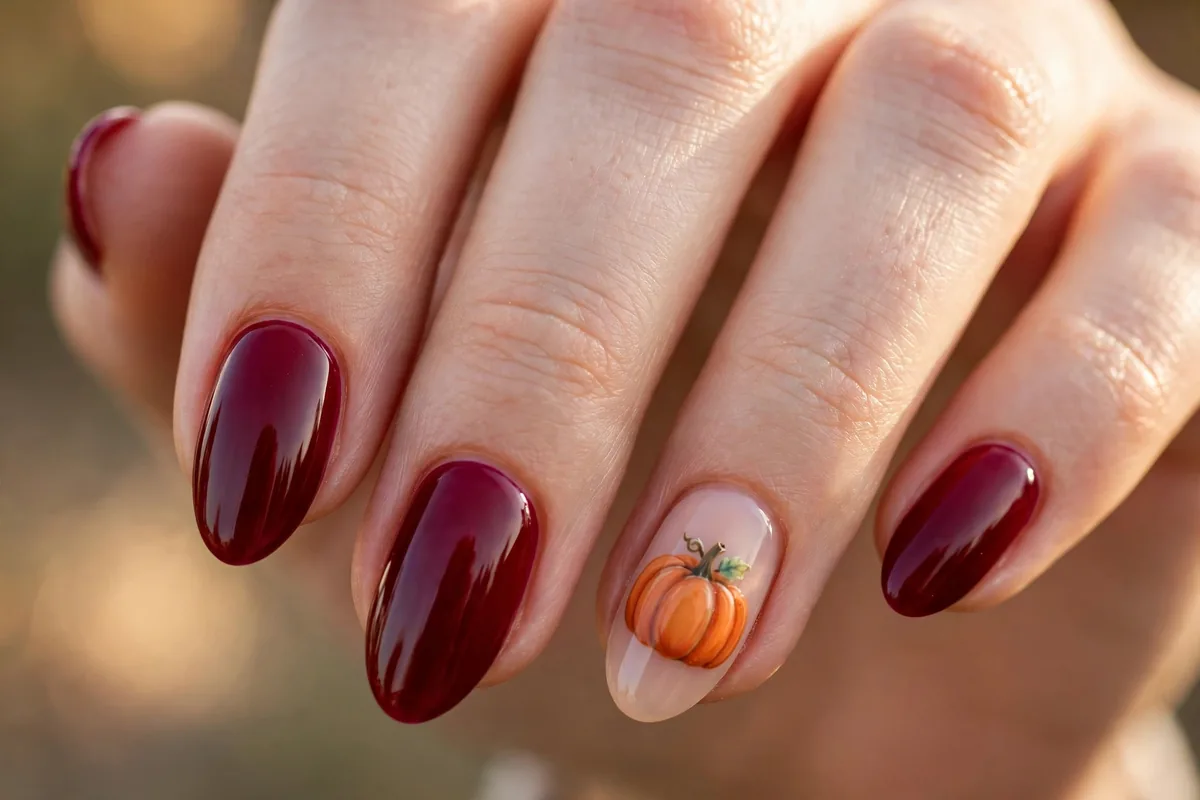
This playful design is perfect for beginners. First, paint all nails a deep cranberry or chocolate, letting them dry fully. Next, on each ring finger, paint a burnt-orange pumpkin: a rounded shape slightly wider than tall, using two or three curved strokes. Then add a short brown stem and a tiny green leaf at the top with a detail brush.
However, keep the pumpkin small and centered for the neatest look. Finally, apply top coat to seal the design. The whole accent takes about ten minutes per hand, and the contrast between the rich base and the cheerful pumpkin always earns compliments.
Thanksgiving Nail Color Palettes That Always Work
Choosing the right colors is half the battle. The classic Thanksgiving palette — cranberry, burnt orange, mustard gold, chocolate brown, and cream — never fails, and these five shades alone can create dozens of designs. Cranberry brings richness, burnt orange brings warmth, gold adds luxury, and cream keeps everything balanced.
For a moodier take, try oxblood, forest green, deep plum, and black cherry. This darker palette feels sophisticated and pairs beautifully with evening gatherings. Alternatively, a softer palette of caramel, taupe, blush, and champagne suits daytime celebrations and professional settings.
Metallics deserve special mention: gold, copper, and bronze catch candlelight beautifully and photograph incredibly well. However, metallics show every ridge, so always apply a smoothing base coat underneath. When in doubt, pick three colors maximum per manicure — a limited palette looks more intentional. For year-round seasonal ideas, our seasonal nail trends guide covers every season’s palette.
How to Make Your Thanksgiving Nails Last Through the Holiday
Thanksgiving week means cooking, cleaning, and hosting — all tough on manicures. Fortunately, a few prep and application habits dramatically extend wear time. First, always start with clean, dry nails: push back cuticles, gently buff away shine, and wipe each nail with alcohol to remove oils. Polish bonds best to a clean surface.
Next, apply thin coats rather than thick ones — they dry faster, cure harder, and chip less. In addition, cap the free edge by running polish along the very tip of each nail, and reapply top coat every two to three days. For maximum durability through a week of cooking and hosting, consider gel polish, which resists chips for two weeks or more.
Your daily habits matter too. Wear gloves for dishes and cleaning, since hot water and detergents are polish killers. Meanwhile, use cuticle oil daily — hydrated nails flex instead of cracking. As the holidays continue into December, our winter nail designs will carry your manicure into the next season.
Common Thanksgiving Nail Art Mistakes to Avoid
Even experienced DIYers slip up with fall nail art. The most common mistake is skipping base coat, especially under cranberry, oxblood, and other deep shades. These pigments stain bare nails badly, and the discoloration can linger for weeks. A good base coat takes sixty seconds and prevents the entire problem.
Another frequent error is painting details on wet polish. Thanksgiving art involves layering — leaves over nude, pumpkins over cranberry — and each layer must be dry before the next goes on. However, if you rush, colors bleed into a muddy mess. When in doubt, wait an extra two minutes between steps; patience is the real secret ingredient.
Overloading every nail with detailed art is also a trap — ten intricate designs look chaotic. However, choose one or two accent nails for art and keep the rest in complementary solids. Finally, do not forget top coat — it seals your designs, adds shine, and protects against chips through the whole holiday week.
Frequently Asked Questions
When should I do my thanksgiving nails?
For regular polish, paint one to two days before Thanksgiving so your manicure looks fresh for the holiday. Gel or acrylics can go on up to a week ahead. Since fall shades suit the whole season, thanksgiving nail art works beautifully from late October onward.
What colors are best for thanksgiving nails?
For example, cranberry, oxblood, burnt orange, mustard gold, chocolate brown, and cream are the classics. For a moodier look, try forest green or deep plum. Gold and copper metallics add festive luxury to any fall shade.
Can I do thanksgiving nail art as a beginner?
Absolutely — many fall designs are beginner-friendly. Leaves, dots, plaid lines, and stickers all rely on simple shapes, and deep fall shades hide small mistakes well. Start with a solid color plus one accent nail.
How long will a thanksgiving manicure last?
Five to seven days for regular polish with good prep; two weeks or more for gel. Cooking and hosting are tough on nails, so cap the free edge, reapply top coat mid-week, and wear gloves for dishes.
What nail shape suits fall designs best?
For example, almond and oval suit nearly every Thanksgiving design, giving leaf and plaid art room to breathe. Short squoval nails suit minimalist fall looks and handle cooking better. Choose based on your holiday plans.
How do I remove dark fall polish without staining?
Soak a cotton pad in acetone remover, press it on the nail for ten seconds, then swipe toward the tip in one motion. A base coat worn underneath prevents most staining. If light staining remains, a gentle buff usually clears it.
Conclusion
Thanksgiving nails are the coziest accessory of the fall season — warm, festive, and guaranteed to spark compliments around the dinner table. Whether you choose cranberry solids, golden leaves, cozy plaid, or playful pumpkins, there is a design here for every style and skill level.
Remember the fundamentals: prep properly, work in thin layers, let each step dry, and always finish with top coat. When December arrives, our christmas nails guide will take your manicure into the next holiday.
Now it is your turn to welcome the harvest season. Pick a design, gather your fall shades, and enjoy the warmest manicure of the year. Happy Thanksgiving!