Gel nails have become one of the most preferred choices for achieving a smooth, glossy, and long-lasting finish. Whether you want a natural look or a bold design, gel nails offer flexibility and durability that make them ideal for everyday use.
With years of observing nail trends and application techniques, it is clear that gel nails continue to dominate because of their clean finish and strong hold. This guide will help you understand how to apply, maintain, and style gel nails at home with confidence.
Why gel nails are so popular

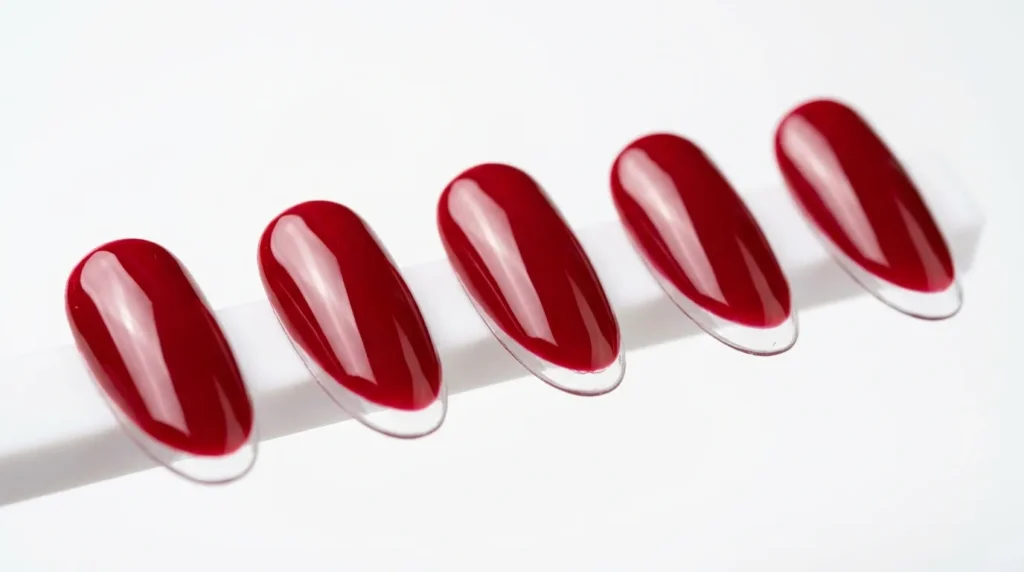
One of the biggest reasons behind the popularity of gel nails is their glossy finish. Unlike regular polish, gel nails maintain their shine for a longer time without fading.
Another key advantage is durability. Gel nails resist chipping and can last for weeks when applied correctly. This makes them a reliable option for people who want low-maintenance yet stylish nails.
What are gel nails and how they work
Gel nails are created using a special gel-based polish that hardens under a curing light. This process forms a strong and flexible layer on the nails.
Once cured, gel nails provide a smooth and durable surface that looks professional. They are widely used for both simple and detailed nail designs.
Essential tools for gel nails
You don’t need a professional setup to start. Basic tools are enough to create good results.
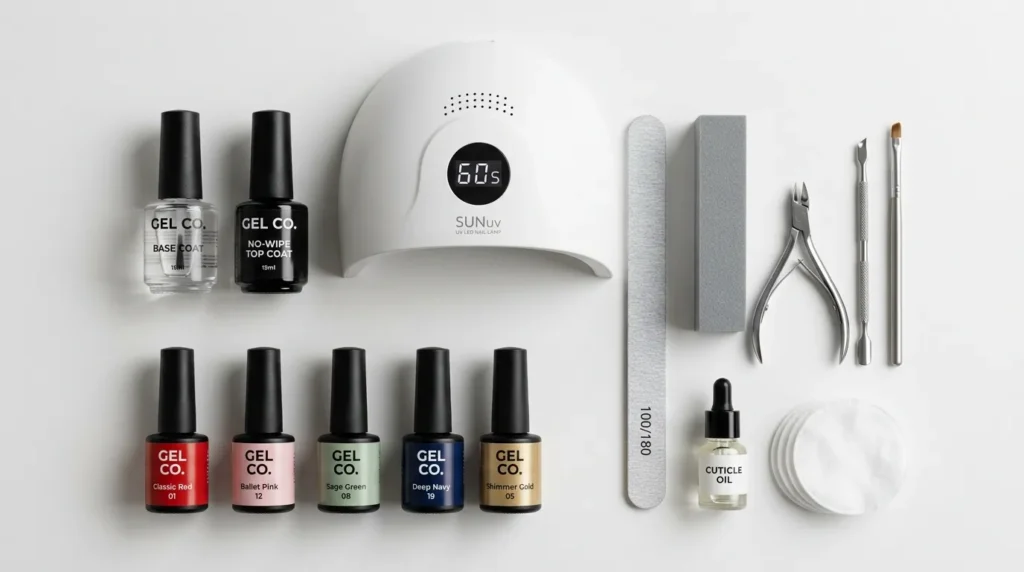
Tools you need
- Gel nail polish
- Base coat and top coat
- UV or LED lamp
- Nail file and buffer
Using the right tools improves the quality and durability of your gel nails.
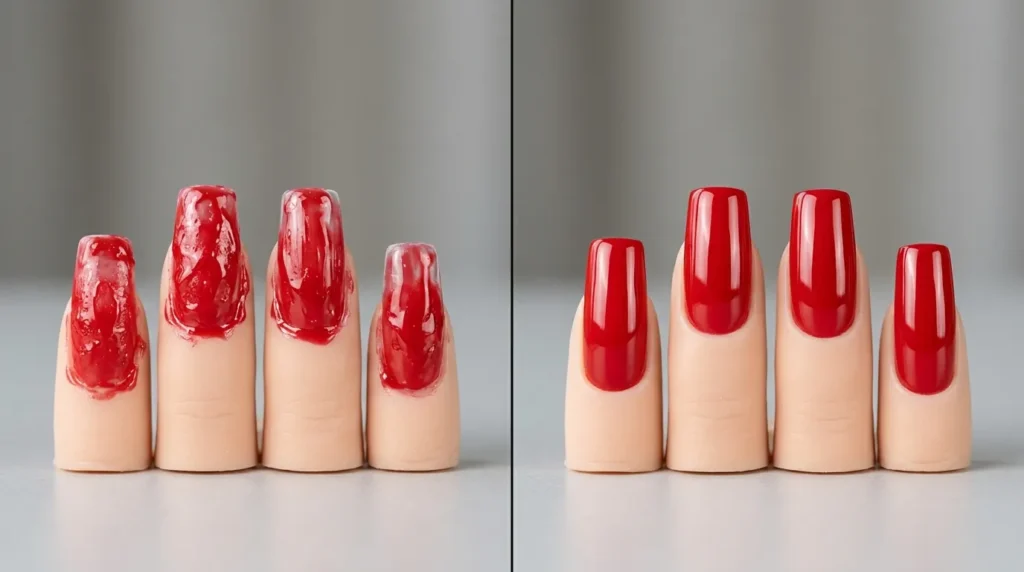
Step-by-step gel nails application
A proper method ensures smooth and long-lasting results.
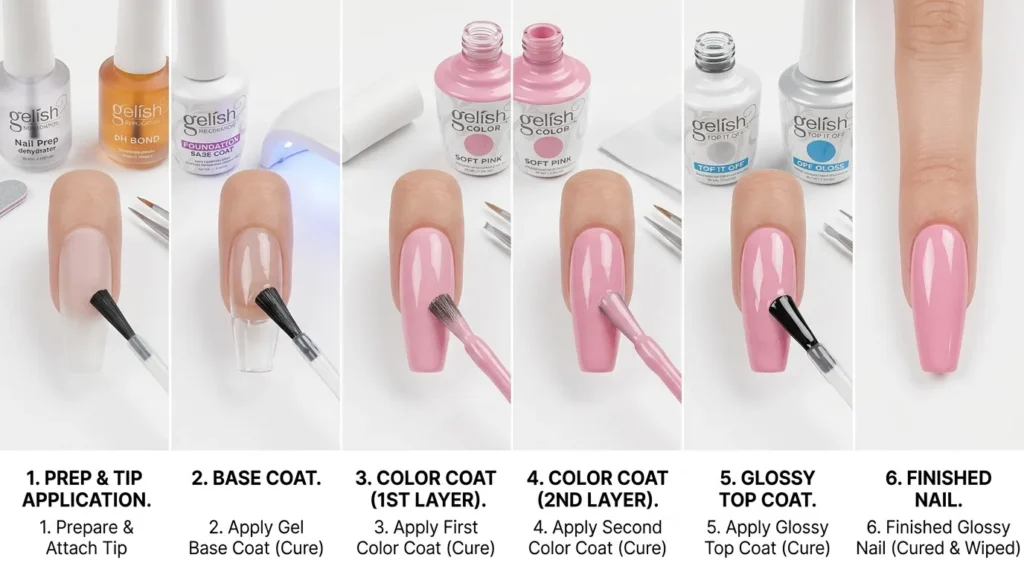
Simple steps
- Clean and prepare your nails
- Apply a base coat
- Cure under UV or LED lamp
- Apply gel polish in thin layers
- Cure each layer properly
- Finish with a top coat
This process helps you achieve clean and professional-looking gel nails at home.
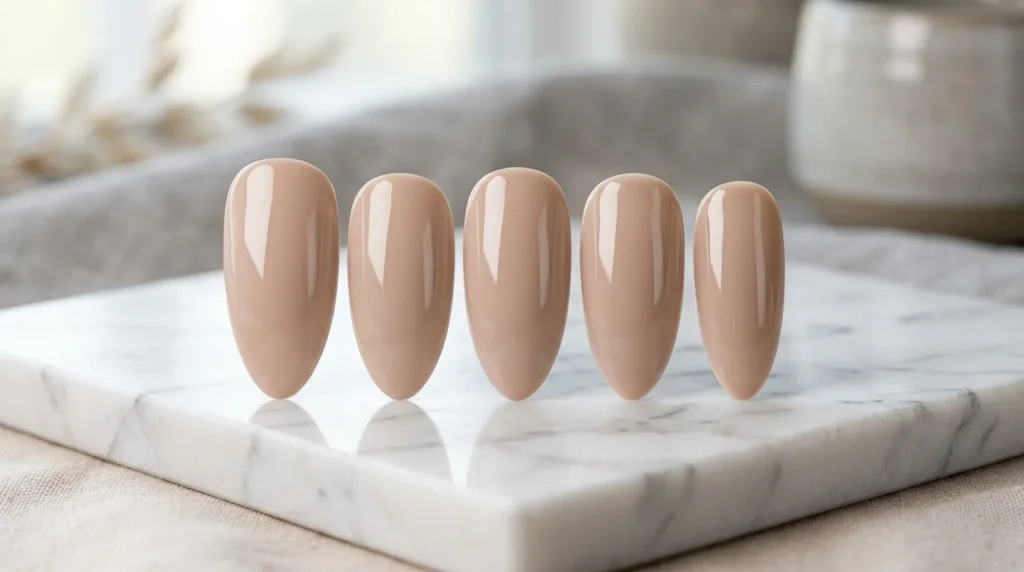
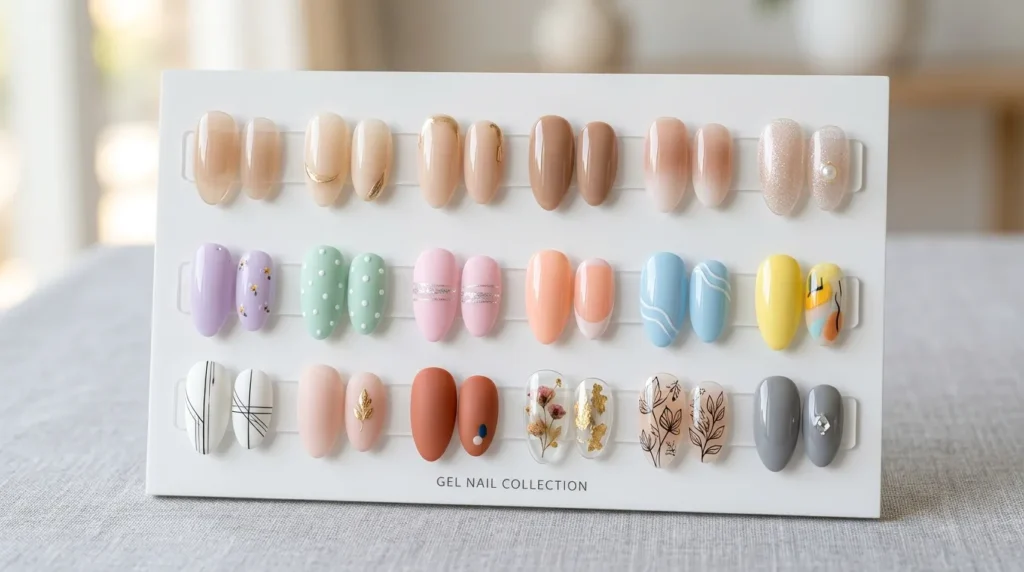
Easy gel nails design ideas
If you are starting out, choose simple styles that are easy to manage.
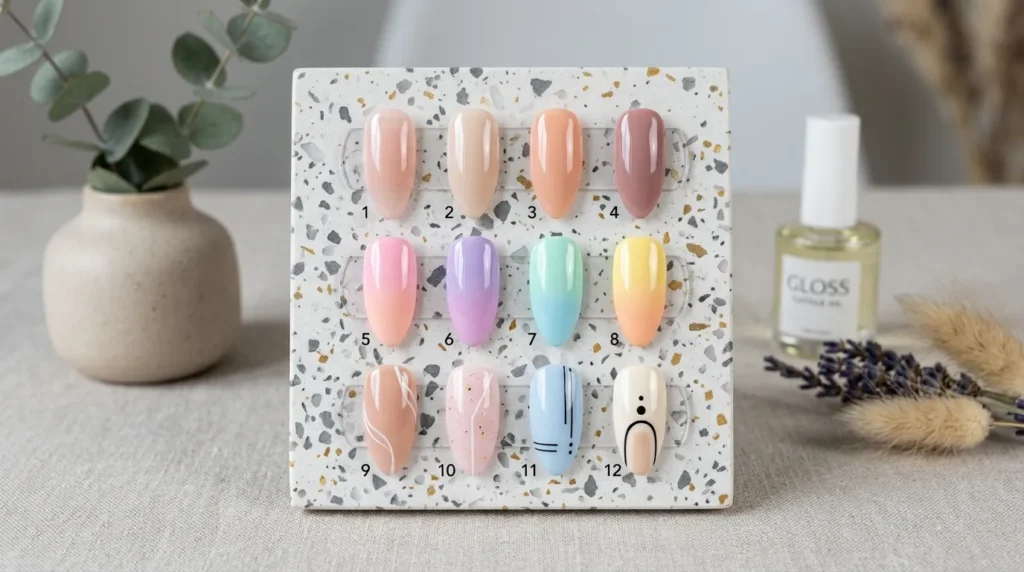
Beginner-friendly ideas
- Glossy nude nails
- Soft ombre designs
- Minimal line art
- Pastel shades
These styles are simple yet elegant and work well with gel nails.
Tips to make gel nails look professional
Small details can improve your results significantly.
Helpful tips
- Apply thin layers of polish
- Cure each layer properly
- Keep edges clean
- Use a quality top coat
Consistency and patience will make your gel nails look salon-quality.
Common mistakes to avoid
Avoiding mistakes will help you get better results.
Mistakes to watch out for
- Applying thick layers
- Skipping curing time
- Not preparing nails properly
- Using low-quality products
Keeping your application simple and clean is key to perfect gel nails.
How to care for gel nails
Proper care is important to maintain shine and strength.
Care tips
- Avoid peeling the polish
- Moisturize cuticles regularly
- Protect nails from harsh chemicals
- Remove gel properly
These steps will help your gel nails last longer and stay healthy.
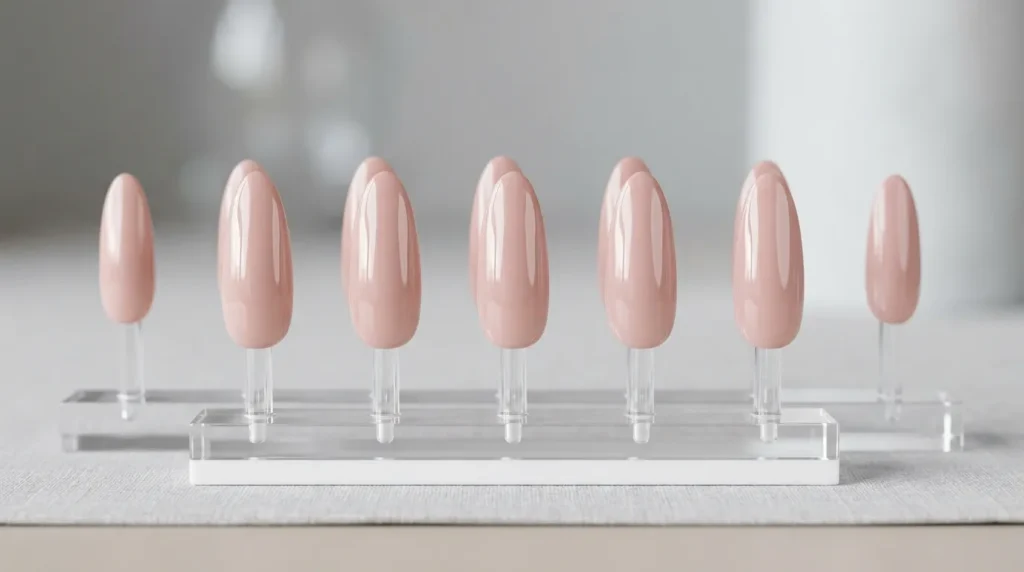
Choosing the right gel nails style
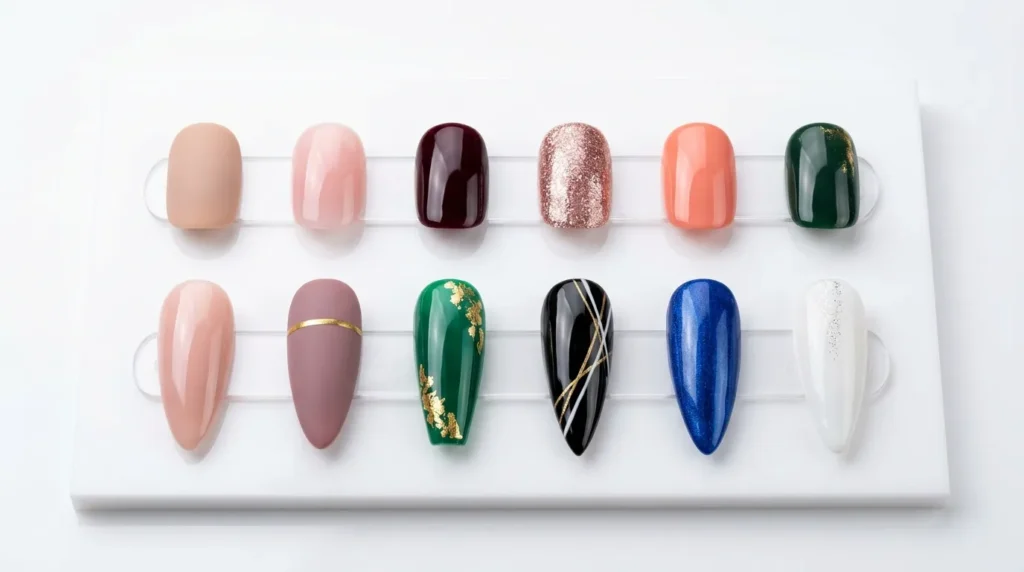
Gel nails allow you to experiment with different shapes and colors. You can go for short natural styles or longer elegant shapes depending on your preference.
Neutral tones are perfect for daily wear, while bold colors work well for special occasions. Start simple and gradually try more creative designs.
Conclusion
Gel nails are a great option for anyone looking for glossy, long-lasting, and stylish nail designs. They offer durability, flexibility, and a smooth finish that makes them stand out.
With the right tools, simple techniques, and regular practice, you can create beautiful gel nails at home. Focus on proper application, care, and consistency.
Stay inspired, keep experimenting, and enjoy creating nail designs that match your personal style.